
Order Blocks in Forex: Bullish and Bearish Zones with Confirmation Rules
PipSePaisa • Forex Education & Research
INTRODUCTION
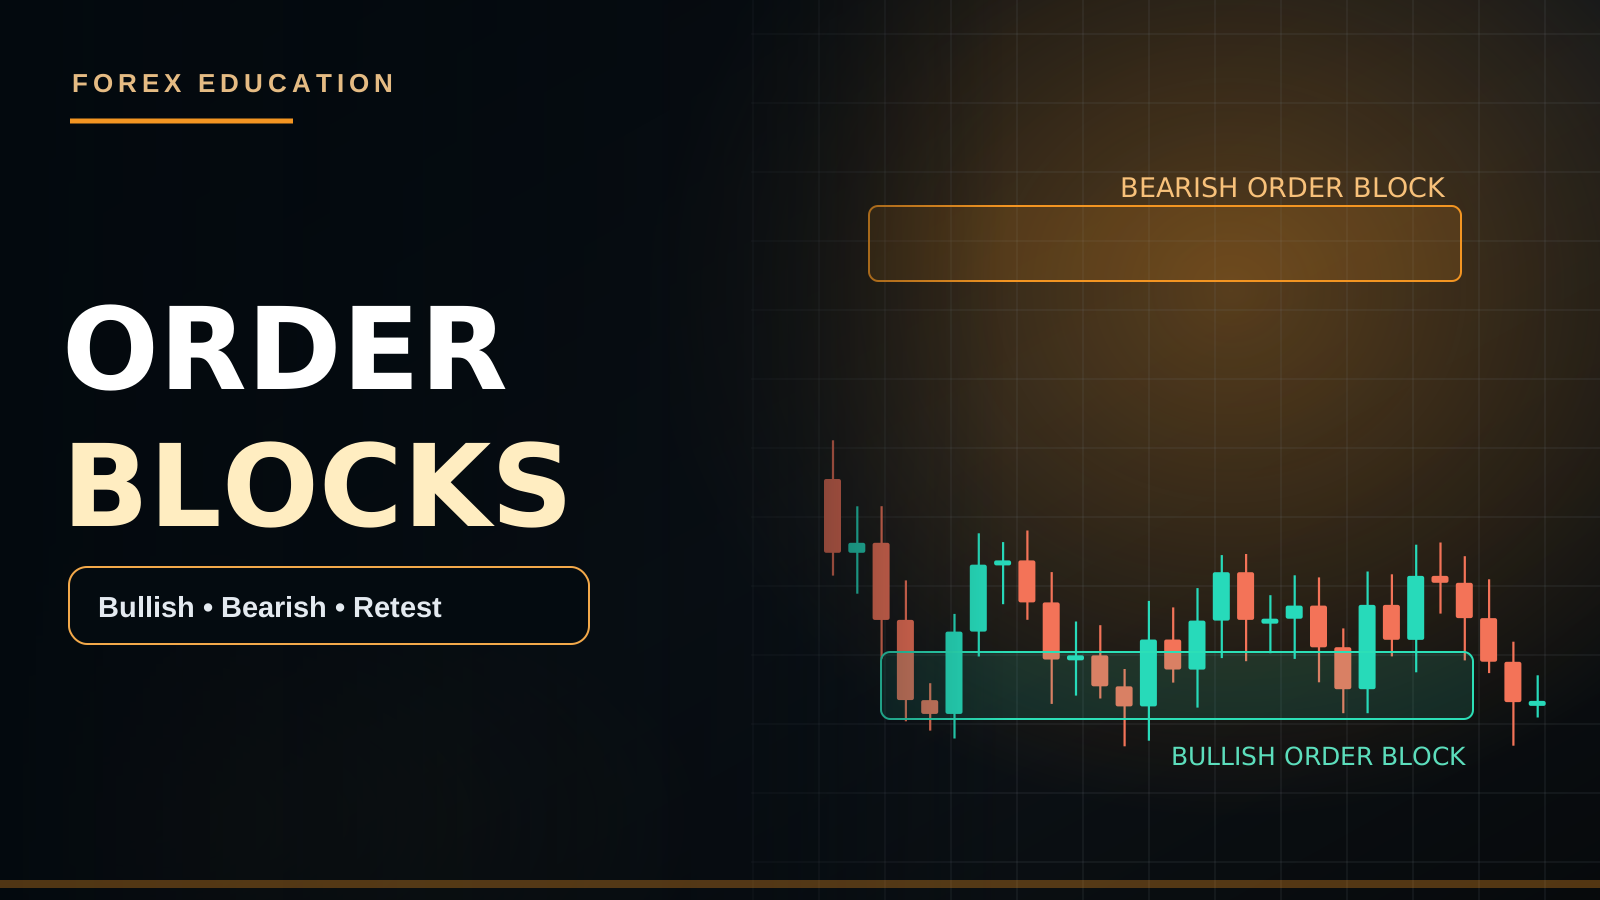
In Smart Money Concepts (SMC), an order block is commonly identified as a candle or compact base before a sharp move that breaks meaningful price structure. It is a candidate reaction zone, not direct evidence that institutional orders are still resting there.
IDENTIFY THE CONTEXT
Start on H4 or H1 and mark significant highs and lows. Seek an impulsive move with strong closes that breaks a meaningful swing. Without displacement and a clearly defined structure reference, selecting any opposite-colored candle becomes arbitrary.
BULLISH ORDER BLOCK
One common method marks the last bearish candle or bearish base before a strong upward departure. Traders draw the zone from the candle body or entire wick depending on their rules. Consistency matters: switching definitions after a losing trade invalidates a fair backtest.
BEARISH ORDER BLOCK
For a bearish candidate, identify the last bullish candle or base before a decisive downward impulse. Note whether the move breaks an important swing low and whether an opposing higher-timeframe demand zone lies directly below.
FAIR VALUE GAP AND LIQUIDITY
Some approaches combine the order block with displacement, a three-candle Fair Value Gap (FVG), or a prior liquidity sweep. Such confluence may provide context, but none of these chart patterns proves that a particular institution placed a large order.
WORKED EXAMPLE
Imagine EUR/USD forms a base at 1.0950–1.0970, rallies to 1.1050 and closes above an H1 swing high. The departure base becomes a possible bullish zone. If price returns, the trader can watch for an M5 rejection close or local bullish structure change. A decisive failure below the relevant swing can invalidate the setup.
ENTRY, STOP AND TARGET
Aggressive limit orders may fill without confirmation. Conservative entries require a completed candle or structure shift. Place the Stop Loss beyond a meaningful invalidation level, adjust position size to the risk budget and consider the next opposing zone for a target. A large stop with limited target room is a reason to skip.
FRESHNESS AND RETESTS
Untested zones may be interesting but are not guaranteed to hold. Repeated visits, strong momentum against the zone and major economic releases can change the scenario.
COMMON MISTAKES
Marking every last red candle as a bullish block; using multiple inconsistent zone rules; assuming 'institutional' means certain; ignoring news; and risking too much in an attempt to enter at a perfect price.
FAQ
Are order blocks and supply/demand identical? They overlap, but order-block definitions often use specific candle and structure criteria. Does an untouched block always work? No.
WHAT AN ORDER BLOCK REPRESENTS
Order Blocks are a Smart Money Concepts method of marking a price origin before a strong move. A popular model selects the final opposite-colored candle or compact base before displacement and a break of significant market structure. A retail candlestick chart does not prove there are still large institutional orders resting at that level. Treat the block as a zone to test, not a guaranteed institutional entry.
BULLISH ORDER BLOCK RULES
On H1 or H4 first identify an upward impulse and a meaningful swing high that price actually breaks. Look back to the last bearish candle or consolidation before that impulse. Define whether your zone uses the full wick or candle body; use the same convention every time. On a return, seek evidence such as M5 selling exhaustion, bullish rejection or CHoCH.
BEARISH ORDER BLOCK RULES
For a bearish candidate, locate a significant downward displacement that breaks an established swing low. The preceding bullish candle or base may become a supply-like zone. If price retests that range, a lower high or bearish engulfing close may strengthen the selling scenario. Do not short automatically because a chart is annotated 'bearish OB.'
ORDER BLOCK AND FAIR VALUE GAP
Some SMC strategies require a nearby three-candle Fair Value Gap (FVG) and a sweep of prior liquidity before accepting an OB. This may focus the selection on clearer displacements, but it also reduces the number of opportunities and does not make trades certain. Specify your FVG definition and evaluate the same rules in historical testing.
MITIGATION AND MULTIPLE RETESTS
Traders sometimes describe a revisit as 'mitigation.' The idea is a model of how price may respond, not proof that an identifiable bank is filling an unobserved order. A fresh area can fail; repeated tests can also change a zone's quality.
WORKED EUR/USD EXAMPLE
Price consolidates at 1.0950–1.0970 and rallies strongly past an H1 swing high toward 1.1050. A bearish origin candle may be a bullish OB candidate. When price revisits, observe whether it forms an M5 bullish structure shift and completed engulfing. SL belongs beyond meaningful invalidation; TP near an opposing supply region should be evaluated before entering.
COMMON ERRORS
Marking every red candle as a Buy block, switching from body to wick boundaries after a loss, ignoring the H4 trend, claiming institutional certainty from a price pattern and using a large lot with no defined stop.
FAQ
Are Order Blocks always different from Supply/Demand? They overlap, but OB models often add structural criteria. Does every order block hold? No. Must confirmation be M5? No, select a documented strategy.
ORDER BLOCKS ARE A MODEL, NOT A VERIFIED ORDER BOOK
The phrase Order Block is popular in Smart Money Concepts and related trading education. It generally describes a selected candle or compact consolidation that preceded an impulsive price move. The interpretation is that the area might matter if price returns. Retail spot forex charts do not reveal every bank's limit-order book, so historical candles cannot establish with certainty that specific institutional Buy or Sell orders remain unfilled at that exact region. A responsible guide distinguishes the visible facts from the theory.
FIRST FIND THE SWING STRUCTURE
Before marking a bullish Order Block, establish which swing high was significant and whether the subsequent upward impulse broke it. For a bearish Order Block, examine whether the downward move broke a meaningful low. A random strong green candle after a red candle is not necessarily a useful OB setup. In a range, small candles repeatedly break internal micro swings; using only H1/H4 significant structure can reduce arbitrary labeling.
BULLISH ORDER BLOCK STEP BY STEP
First identify an H1 or H4 market that creates a clear upside displacement. Second locate the last bearish candle or compact bearish base before the move. Third decide whether the zone uses candle body, full wick or defined base boundaries. Fourth verify that displacement broke a relevant swing high or otherwise met the playbook. Fifth note whether the area has already been retested. Finally wait for price to revisit and observe actual rejection or lower-timeframe structural confirmation.
BEARISH ORDER BLOCK STEP BY STEP
A possible bearish OB is commonly drawn from the final bullish candle or tight upward base before strong downside displacement. The move is more structurally significant if an important low breaks. On retest, the trader can look for M15 upper-wick rejection, an M5 lower high, bearish engulfing close or a bearish CHoCH. A direct Sell Limit at the zone is an aggressive method; a candle-confirmation method may produce fewer entries and different risk.
BODY VERSUS WICK BOUNDARIES
Some traders mark the entire high-to-low range of the origin candle, while others emphasize the body. Neither boundary convention is universally required. The problem arises when a losing trade is reclassified after the fact because the chosen zone did not hold. Define one method and apply it consistently. A very broad candle may create an OB so wide that a reasonable Stop Loss distance makes the trade impractical for a small account.
DISPLACEMENT AND FVG CONFLUENCE
A Fair Value Gap often refers to an apparent gap between the first and third candles of a three-candle sequence, with the middle candle moving sharply. Some SMC systems rank Order Blocks more highly when an FVG lies near the origin. Displacement and imbalance are visible features, not direct proof of institutional order placement. Ask how the FVG changes the entry criteria, Stop Loss location and test results rather than assuming two labels produce certainty.
LIQUIDITY SWEEP BEFORE A STRUCTURAL BREAK
Consider price rising above Equal Highs, then returning beneath them and forming an impulsive bearish structure shift. A trader might mark the origin of that downward leg as a bearish OB candidate. The sweep adds context because obvious highs may attract stops and breakout orders. But charts do not prove the move was intentionally orchestrated by a specific firm. A trade should be judged by observable conditions and measured outcomes.
FRESH VS MITIGATED ORDER BLOCKS
An untested OB has not experienced a return since the original impulse. Some methods call the first return "mitigation," but this is conceptual terminology, not evidence that a known bank is executing a hidden order. Multiple returns may weaken the apparent reaction or produce several successful defenses. Document the number of retests objectively. Avoid assuming freshness alone guarantees buyers or sellers will appear.
BULLISH EUR/USD CASE STUDY
Hypothetically, EUR/USD forms a narrow bearish origin candle near 1.0950–1.0970, then advances and closes above an important H1 swing high at 1.1030. The original base becomes a candidate bullish OB. Later price pulls back. M5 creates a lower wick followed by a completed bullish engulfing above local resistance. A trader may assess a Buy if the Stop Loss beyond the true rejection low and target near opposing Supply provide an acceptable payoff. If price falls through the base, the hypothesis fails.
BEARISH GBP/USD CASE STUDY
Suppose GBP/USD rallies into an H1 price region around 1.2780–1.2800, forms the final small bullish candle and then falls decisively through a meaningful H1 low. The origin may become a bearish OB. On a later revisit, M15 rejects the upper boundary and M5 creates a Lower High. A possible Sell setup can be evaluated only after the trader defines structural invalidation, costs and the next Demand area. A strong Close above the block may invalidate the idea.
ORDER BLOCKS AGAINST THE H4 TREND
An M5 bullish Order Block within a powerful H4 downtrend might create a short-lived bounce, not a new H4 uptrend. If the next major H4 Supply is close, the reward for a Buy may be limited. A trader whose playbook trades only with higher-timeframe bias should skip countertrend blocks even if their shapes look attractive. Consistency matters more than finding the maximum number of OBs.
RISK MANAGEMENT AND EXIT PLANNING
A Buy Limit within an OB may fill without any rejection evidence. A confirmation entry can occur after a large candle and leave a wider Stop Loss. In both cases, loss size must be calculated from equity and the stop-to-entry distance. A target may be the prior swing high, opposing OB or Supply/Demand. If the opposing area is close, a theoretical 1:3 ratio may not be realistic. Never increase lot size because a zone has been labeled institutional.
BACKTESTING ORDER BLOCK STRATEGIES
Specify exact timeframe, structural-break condition, origin candle rule, zone boundaries, freshness criteria, allowed retest count, confirmation trigger, news filter, Stop Loss method and profit target. Collect all matching historical occurrences and include spreads and missed entries. An attractive set of winning screenshots cannot prove that the OB model has positive live expectancy.
FAQ
Does every large candle leave a valid OB? No. Is an Order Block exactly the same as Supply/Demand? The ideas overlap but definitions differ. Can an OB fail on first touch? Yes. Does CHoCH guarantee an OB will hold? No. Is it reasonable to skip a block that offers poor Risk-to-Reward? Yes.
CONCLUSION
Use order blocks as a structured hypothesis about possible reactions, supported by context, confirmation and measured risk.
FREE PIPSEPAISA COURSES
Sir Sajid Khan Ghori — Free Forex Technical Analysis Course. Want to join? Message the team on WhatsApp or visit the Courses tab at www.pipsepaisa.com for enrollment.
Sir Ghulam Abbas — Free Forex Fundamental Analysis Course. Message on WhatsApp or use the Courses tab to enroll.
RISK NOTICE
These are educational illustrations, not trade recommendations. Leveraged trading risks loss of capital.
Read in Roman Urdu
INTRODUCTION
SMC mein Order Block aksar us candle ya base ko kehte hain jahan se strong move start ho kar meaningful structure break hui. Ye possible reaction zone hai, hidden institutional orders ka direct proof nahi.
CONTEXT
H4/H1 par major highs/lows mark karein. Strong displacement aur swing break identify karein. Bina structure ke har opposite color candle ko Order Block nahi kehna chahiye.
BULLISH ORDER BLOCK
Common approach mein impulsive upward move se pehle last bearish candle ya bearish base mark hota hai. Kuch traders body, kuch full wick use karte hain. Har setup par same drawing rule rakhein.
BEARISH ORDER BLOCK
Sharp downward movement se pehle last bullish base candidate bearish Order Block ban sakta hai, khas tor par jab swing low break ho. Neeche nearby H4 Demand bhi check karein.
FVG AUR LIQUIDITY
Fair Value Gap, liquidity sweep aur displacement ko extra context samjha ja sakta hai. Ye institutional orders ke exist karne ka final evidence nahi.
EXAMPLE
EUR/USD 1.0950–1.0970 base se 1.1050 tak jaye aur H1 high break kare. Base potential bullish OB ho sakta hai. Retest par M5 rejection close ya bullish CHoCH ka wait karein. Zone ke neeche decisive failure setup invalid kar sakta hai.
ENTRY, SL, TP
Limit order bina confirmation fill ho sakta hai. Confirmed entry M5 close ya structure shift use kar sakti hai. SL meaningful swing beyond aur TP next opposing zone par plan karein. Risk ke mutabiq lot calculate karein.
FRESHNESS
Fresh zone guaranteed nahi. Multiple retests, strong selling ya important news context change kar sakti hai.
MISTAKES
Har red candle par zone, rules change karna, blind entry aur oversized risk.
FAQ
Kya Order Block aur Supply/Demand same? Related lekin rules different ho sakte hain. Kya fresh zone fail ho sakta hai? Haan.
ORDER BLOCK KYA HOTA HAI?
SMC mein Order Block ek possible price origin hai jahan se strong movement start hui aur meaningful Market Structure break hui. Common approach mein impulsive move se pehle last opposite-color candle ya base mark ki jati hai. Lekin retail chart se ye prove nahi hota ke kisi specific bank ke huge pending orders abhi bhi wahan hain. OB ko potential Zone samjhein, guaranteed signal nahi.
BULLISH ORDER BLOCK
H1/H4 par strong upward impulse identify karein. Kya previous important swing high break hua? Phir displacement se pehle last bearish candle ya consolidation dekhein. Zone Candle Body par banani hai ya Full Wick, apna rule consistent rakhein. Price retest kare to M5 rejection, bullish Engulfing ya CHoCH se confirmation evaluate karein.
BEARISH ORDER BLOCK
Strong bearish displacement se pehle last bullish candle ya base mark ho sakti hai, jab move significant Swing Low break kare. Price wapas aaye to M5 Lower High, bearish Engulfing close ya selling rejection ka wait karein. Sirf 'Bearish OB' label dekh kar Sell lena risky hai.
ORDER BLOCK AUR FVG
Kuch SMC strategies OB ke saath Fair Value Gap aur Liquidity Sweep bhi require karti hain. FVG three-candle imbalance pattern ka technical naam hai. Multiple conditions selection ko strict banati hain, lekin profit guarantee nahi. Apni FVG definition aur entry rules backtest karein.
MITIGATION KYA HAI?
Zone ke revisit ko kai traders Mitigation kehte hain. Ye ek price-action interpretation hai, hidden bank orders ki confirmation nahi. Fresh Zone bhi fail ho sakti hai aur repeated retests quality change kar sakte hain.
EUR/USD EXAMPLE
Price 1.0950–1.0970 base banaye, phir H1 high break kar ke 1.1050 tak jaye. Origin ke paas bearish candle bullish OB candidate ho sakti hai. Retest par M5 bullish CHoCH/Engulfing close observe karein. Relevant low ke beyond SL aur next Supply Zone tak realistic TP evaluate karein.
MISTAKES
Har red candle par Buy Order Block, loss ke baad Body/Wick drawing change, H4 trend ignore karna aur Stop Loss ke baghair large lot lagana avoid karein.
FAQ
OB aur Supply/Demand same? Related, exact rules different. Har OB hold? Nahi. Sirf M5 confirmation? Nahi, tested strategy select karein.
ORDER BLOCK VERIFIED BANK ORDERS NAHI
Smart Money Concepts mein Order Block ek popular chart-based Zone hai. Common idea ye hai ke strong price movement se pehle jo selected candle ya compact Base bani us par future return mein reaction possible ho sakti hai. Lekin Retail Spot Forex Chart par har bank ka complete Limit Order Book visible nahi. Is liye historical candle dekh kar confidently kehna ke 'is exact price par institutional orders guaranteed pending hain' accurate nahi. Chart Evidence aur Theory ko separate samjhein.
PEHLE SWING STRUCTURE CHECK KAREIN
Bullish OB identify karne se pehle important Swing High mark karein aur dekhein kya upward displacement ne usay break kiya. Bearish OB ke liye important Swing Low aur downward displacement analyze karein. Har Red Candle ke baad Green Candle banne se meaningful bullish OB automatically nahi hoti. Ranging market mein chhote M5 highs/lows repeatedly break hote rehte hain; H1/H4 significance ko priority dena arbitrary markings reduce kar sakta hai.
BULLISH ORDER BLOCK MARKING PROCESS
Step 1 H1/H4 par Clear Upward Displacement identify karein. Step 2 us move se pehle Last Bearish Candle ya Tight Bearish Base locate karein. Step 3 decide karein Zone Full Wick se draw hogi ya Candle Body se. Step 4 check karein meaningful BOS hua tha? Step 5 Freshness aur retest history note karein. Step 6 Price ke return ka wait. Step 7 M5/M15 Rejection, Engulfing Close ya CHoCH confirm karein. Sirf line touch = guaranteed Buy nahi.
BEARISH ORDER BLOCK MARKING
Strong downward displacement se pehle Last Bullish Candle ya chhoti bullish Base possible Bearish OB ho sakti hai. Agar move important H1 Low break kare to extra structural context milta hai. Retest par M15 Upper Wick Rejection, M5 Lower High, Bearish Engulfing Close ya CHoCH ka wait kar sakte hain. Direct Sell Limit ek aggressive first-touch method hai. Confirmation-based entry comparatively different strategy hai jis mein Stop Distance aur Entry Price bhi different ho sakte hain.
BODY VS WICK KA CONSISTENT RULE
Kuch traders Origin Candle ka Full High-to-Low Zone use karte hain. Doosre Body boundaries prefer karte hain. Koi ek universal compulsory method nahi. Lekin winning trade par Body aur losing trade par Wick switch karna Backtesting ko biased bana deta hai. Har chart mein same rule follow karein. Agar origin candle bohat wide hai to required structural SL bhi wide ho sakta hai. Risk Amount manage na ho to OB attractive hone ke bawajood No Trade.
ORDER BLOCK AUR FAIR VALUE GAP
FVG ek common three-candle price imbalance pattern ka technical naam hai jahan first aur third candles ke ranges ke darmiyan visible gap type condition appear hoti hai. Kuch SMC models OB ke qareeb FVG ho to Confluence consider karte hain. Lekin FVG aur Displacement se direct hidden Institutional Orders prove nahi hotay. Sawal ye hai ke FVG add karne se Entry Rules, Stop Location aur actual Backtest Results improve hote hain ya nahi.
LIQUIDITY SWEEP + ORDER BLOCK
Price Equal Highs ke upar temporarily wick de kar Range ke andar return kar sakti hai. Uske baad strong Bearish CHoCH ho aur origin candle mark ki jaye to possible Bearish OB + Liquidity Sweep model ban sakta hai. Lekin sweep dekh kar kisi specific bank ko intentional manipulation ka credit dena bina independent evidence inaccurate hai. Observable Candle Close, Swing Break aur Retest Reaction ko objective tarah evaluate karein.
FRESH AUR MITIGATED OB
Fresh OB woh hai jahan displacement ke baad Price abhi return nahi hui. Kuch traders First Return ko Mitigation kehte hain. Lekin ye prove nahi karta ke koi known bank us waqt guaranteed order fill kar rahi hai. First Retest par Zone fail bhi ho sakti hai. Multiple visits par kabhi hold aur kabhi break ho sakti hai. Retest Count ko Journal mein record karein. Sirf Fresh label dekh kar lot increase na karein.
EUR/USD BULLISH EXAMPLE
Hypothetical EUR/USD 1.0950–1.0970 ke qareeb bearish origin Base banati hai. Phir strong rise H1 Swing High 1.1030 ke upar close deta hai. Old Origin potential Bullish OB hai. Price return kare, M5 Lower Wick aur completed Bullish Engulfing local Resistance ke upar close de. Tab Possible Buy Evaluate karein. Stop Loss actual rejection low ke beyond aur TP Nearest Opposing Supply par consider karein. Agar price Base decisively break kare to bullish idea fail.
GBP/USD BEARISH EXAMPLE
GBP/USD H1 par 1.2780–1.2800 ke area mein final small bullish candle banati hai, phir strong downside displacement important Low break karti hai. Origin possible Bearish OB hai. Retest par M15 Upper Wick Reject kare aur M5 Lower High form kare. Sell setup ko SL beyond important High, Lot Budget aur next H1 Demand tak Reward Distance se judge karein. Agar H1 candle Block ke upar strong Close de to Sell thesis weak ho sakti hai.
H4 TREND KE AGAINST ORDER BLOCK
M5 par beautiful Bullish OB ho sakta hai, lekin H4 strong downtrend mein ho. Aisa block sirf temporary bounce create kar sakta hai, full market reversal nahi. Agar H4 Supply qareeb hai to Buy potential reward limited ho sakti hai. Agar aapka playbook only H4 trend continuation trades leta hai to Countertrend OB skip karna disciplined decision hai. Har OB trade karna compulsory nahi.
ENTRY SL TP AUR RISK
Aggressive Buy Limit OB mein bina completed rejection ke fill ho sakti hai. Conservative confirmation entry M5 large candle ke baad mile to SL wider ho sakta hai. Dono cases mein Equity Risk aur Stop Distance se Lot calculate karein. TP previous Swing High, Opposite OB ya Supply/Demand ke qareeb logical ho sakti hai. Sirf 'Institutional Block' keh kar higher lot ya guaranteed 1:3 reward assume na karein.
OB STRATEGY BACKTEST
Exact Timeframe, Swing-Break Rule, Origin Candle Definition, Full Wick/Body Zone, Freshness, Retest Count, M5 Confirmation, News Filter, Stop Method aur Target Rules likhein. Har Historical Valid Setup include karein, sirf Winners nahi. Spread aur Slippage assumptions realistic rakhein. Good-looking setup ki Screenshot collection positive Expectancy ka strong proof nahi.
FAQ
Har big candle se OB? Nahi. OB aur Supply/Demand same? Related but rules differ. Fresh OB first touch par fail? Haan. CHoCH guaranteed OB reaction? Nahi. Poor RR ho to block skip? Bilkul.
CONCLUSION
Order Block ko analysis ka hypothesis samjhein, guarantee nahi.
PIPSEPAISA FREE COURSES
Sir Sajid Khan Ghori ka Free Forex Technical Analysis Course join karne ke liye WhatsApp par message karein ya www.pipsepaisa.com ke Courses tab se enroll karein.
Sir Ghulam Abbas ke Free Forex Fundamental Analysis Course ko bhi WhatsApp ya Courses tab se join karein.
DISCLAIMER
Educational examples hain, live signals nahi. Trading mein loss possible hai.
Educational content only. Trading involves risk. Always use independent analysis and appropriate risk management.