
Inside Bar Trading Strategy: Mother Bar, Breakout Triggers and False Breaks
PipSePaisa • Forex Education & Research
INTRODUCTION
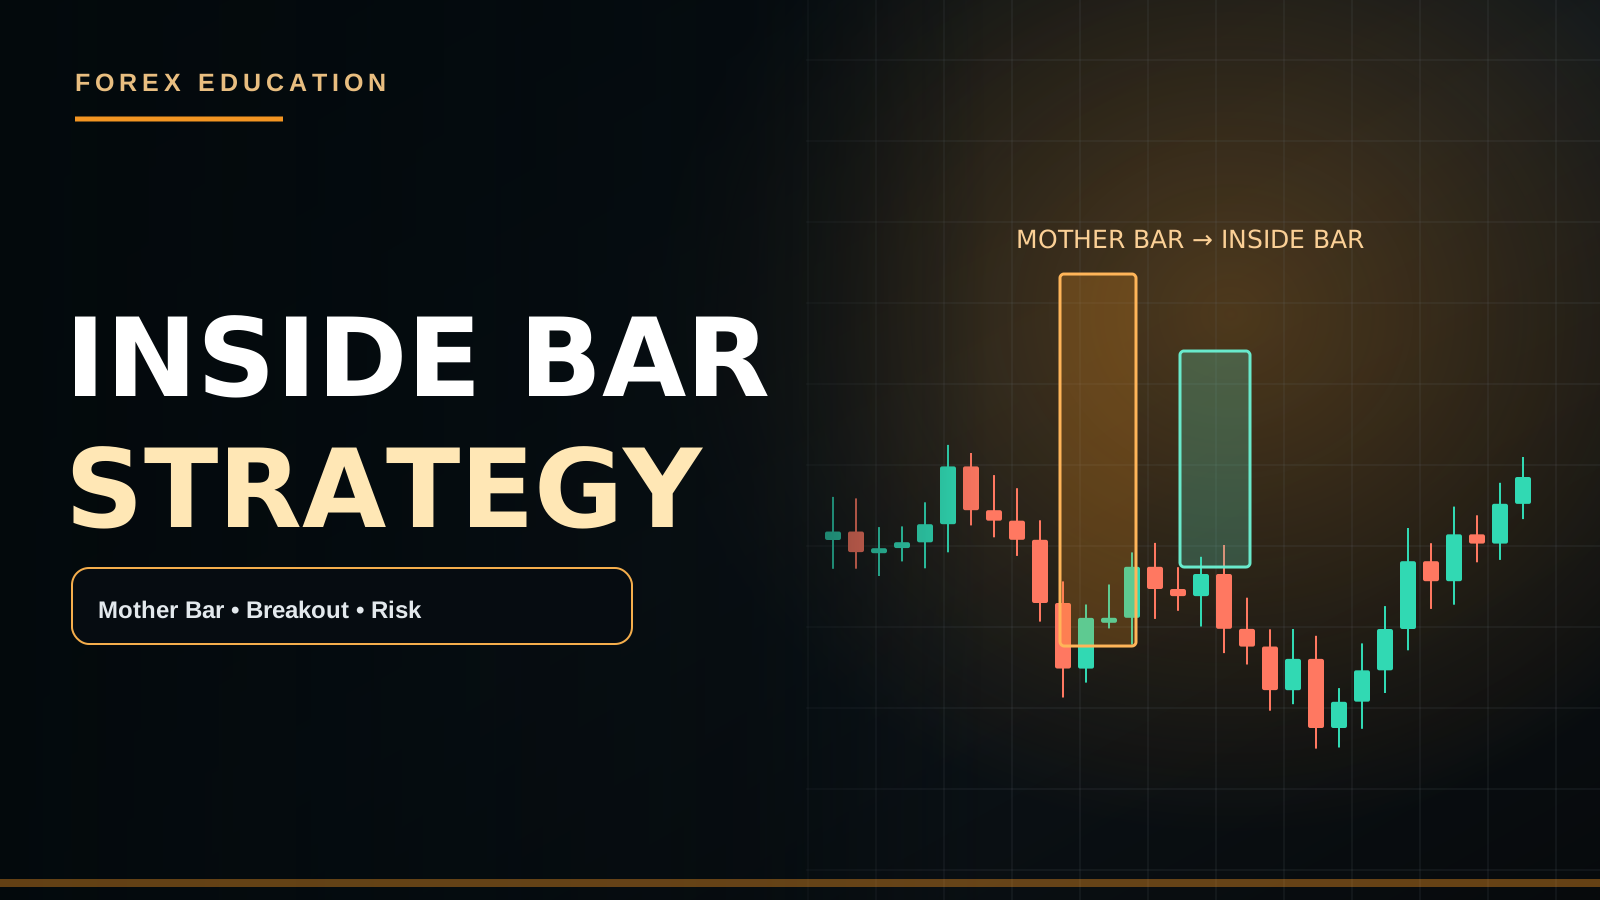
An Inside Bar has a high below and a low above the preceding Mother Bar's extremes under a strict wick-based definition. The pattern indicates relative price compression, not the direction of the next significant move.
PRACTICAL MARKET EXAMPLE
A Gold inside bar forms after strong H1 bullish movement. A Buy Stop above the Mother Bar may trigger on an upper wick and fail, whereas a close-confirmation trader may wait for genuine breakout acceptance.
IMPORTANT LIMITATIONS
Multiple nested inside bars can precede either breakout direction; an economic release can override technical expectations.
WHAT AN INSIDE BAR REALLY SHOWS
An Inside Bar is a candlestick pattern in which the high and low of one candle remain within the high and low of the previous, larger candle, often called the Mother Bar. Some traders allow equal highs or lows; a strict definition requires the newer candle's extremes to be inside. This is a description of relative range contraction, not a guarantee that orders are accumulating in one direction. The next move may break upward, break downward or remain inside the previous range for additional candles.
THE MOTHER BAR'S ROLE
The Mother Bar sets the reference boundaries against which the smaller Inside Bar is assessed. Its High and Low may become possible breakout levels for strategies that trade expansion. But a large Mother Bar created by CPI news can cover an unusually wide area. A stop beyond its far extreme may be unaffordable for a small account. If the Mother Bar spans normal H1 Supply and Demand zones, its geometric size may make a simple pending-order strategy impractical.
STRICT VERSUS FLEXIBLE DEFINITIONS
Under a strict Inside Bar model, the second candle's High is lower than the Mother Bar High and its Low is higher than the Mother Bar Low. Some definitions count equality at one or both boundaries. The rules can change how many patterns appear, especially on markets with tick-size rounding. Decide the convention before a test. Do not redefine a borderline losing pattern as invalid while counting similarly borderline winners as successful. Repeatability is essential.
MULTIPLE OR NESTED INSIDE BARS
Sometimes a third or fourth candle also stays within the Mother Bar's range, forming a series of nested consolidations. This may show ongoing contraction, but it does not mean the eventual breakout must be unusually large or bullish. Some strategies keep the original Mother Bar boundaries; others update to the newest smaller range. Those approaches produce different trigger prices and Stop Loss levels. Write down which version you use and when the order idea expires.
A BULLISH INSIDE BAR SETUP
Suppose EUR/USD H4 is in a clear uptrend. H1 pulls back toward a pre-marked Demand Zone and forms a bullish rejection Mother Bar followed by a smaller Inside Bar. A trader might wait for M15/M5 price to close above the Mother Bar High, then for a retest or a completed Higher Low. This adds price-action confirmation beyond the mere smaller candle. A Stop Loss can be placed beneath meaningful structural invalidation, and the nearest H1 Supply determines the possible reward.
A BEARISH INSIDE BAR SETUP
Imagine GBP/USD H4 is bearish and H1 rally reaches an old Support-turned-Resistance band. A bearish Mother Bar forms with an Inside Bar contained within its range. A subsequent completed break beneath the Mother Bar Low may provide a bearish continuation clue. A conservative trader may require M5 Lower High and Bearish Engulfing confirmation. But if the Bank of England announces an unexpected policy change, price could break above the Mother Bar and invalidate the thesis.
A GOLD NUMERICAL EXAMPLE
Hypothetically, a Gold H1 Mother Bar has High $2,520 and Low $2,500. The next candle trades entirely between $2,507 and $2,515. That is an Inside Bar under a strict definition. A Buy Stop at the Mother Bar High may activate if price briefly crosses $2,520, even if the breakout candle later closes below. In addition, an entry above $2,520 with a Stop beneath $2,500 implies over $20 of Gold price distance before buffer and costs. The account risk must be calculated using the exact broker contract.
WHY BREAKOUT ORDERS CAN BE DANGEROUS
A Buy Stop above Mother Bar High or Sell Stop beneath Mother Bar Low may execute during a brief wick. The signal does not wait for a completed M5 or H1 candle unless the order logic explicitly does so. This is different from a confirmation-based strategy that waits for candle close before entering. First-touch breakouts may participate in fast moves but suffer more false activation. Neither method is universally superior; performance and execution costs must be tested.
THE INSIDE BAR FAKEOUT
Price may break one side of the Mother Bar, trigger orders, return into the range and then break the opposite side. Some traders call this a false break or Inside Bar Fakey pattern. The chart does not establish which institutions were responsible for the temporary breakout. An analyst can record the completed candle returning inside and later structural shift as observable conditions. Treat 'failed break then reverse' as a separate setup with its own invalidation and targets.
TIMEFRAME HIERARCHY
An M1 Inside Bar is a minor contraction relative to an M1 Mother Bar, while an H4 Inside Bar can span a substantial amount of trading activity. For many intraday strategies, H4 provides directional bias, H1 provides important zones and M5 supplies execution confirmation. Counting every M1 Inside Bar while ignoring higher-timeframe structure can lead to overtrading. Choose the timeframe of the pattern and the timeframe of the trigger deliberately instead of moving between charts opportunistically.
INSIDE BAR AT SUPPORT OR RESISTANCE
An Inside Bar in the center of an H1 Range may carry less directional context than one at a historical Demand or Supply area. If price tests H4 Demand and then pauses inside a Mother Bar, the trader might monitor a bullish reaction. But if the Mother Bar is already inside strong H4 Supply after an extended rally, a new long may have insufficient target room. Location and expected payoff matter more than a pattern label alone.
STOP LOSS AND POSITION SIZE
A pattern-based stop beyond the far side of a Mother Bar may be wide when the bar was large. Another model could use a smaller M5 structural swing, but then it is a different stop methodology. A trader should not place a very tight stop inside the range merely to enlarge the lot. Calculate expected loss from Equity, Stop Distance and instrument pip/tick value. If the broker's minimum volume exceeds the acceptable risk, skip the trade.
INSIDE BARS DURING NEWS
Before CPI or NFP, markets sometimes consolidate as participants await information. An Inside Bar may develop, but a news release can produce a gap-like burst through both boundaries with poor stop execution. A tight scalping method may be unsuited to that environment. Even after a completed breakout, subsequent data components can reverse the initial move. If the plan avoids news, do not treat the Mother Bar as permission to trade the event anyway.
A BACKTESTING FRAMEWORK
Specify Inside Bar equality rules, timeframe, Mother Bar size limits, nested-bar handling, trend direction filter, H1 location, breakout wick versus close requirement, retest rule, Stop Loss and target. Record every qualifying formation even if it stays inside the range and never triggers. Analyze false breaks and the number of bars before an entry expires. Include spread and slippage so the results represent a realistic trading process.
FREQUENTLY ASKED QUESTIONS
Does every Inside Bar break strongly? No. Must the child candle be bullish for a bullish setup? Not necessarily; definitions vary. Can several Inside Bars form inside one Mother Bar? Yes. Does a Buy Stop wait for a completed candle? No. Can the false-break idea work in either direction? It can be tested, but no outcome is guaranteed. Should price location and risk be checked first? Yes.
PRACTICAL RULE TO REMEMBER
An Inside Bar highlights a smaller range inside a prior candle. That information is potentially useful for timing or observing compression, but it does not identify a future winner. A structured process is: H4 Context → H1 Zone → Mother Bar Boundaries → Completed Breakout/Retest → M5 Confirmation → Structural Stop → Correct Lot. If any required step is missing, standing aside is consistent with the strategy. No Confirmation = No Trade.
THE COST OF WAITING FOR A RETEST
A confirming breakout candle might be large and the stop beyond the Mother Bar opposite extreme may become wide. If a trader waits for a retest, they may improve the planned entry distance but also miss moves that never revisit the old boundary. Neither outcome is necessarily a strategic failure. Compare the rate of missed setups, the average net R and the cost of false breakout fills. A good process should define what happens when the window closes without an entry rather than forcing participation after the price has already moved.
A NO-TRADE CHECKLIST FOR INSIDE BARS
Skip if the higher-timeframe structure strongly contradicts the planned direction, the Mother Bar is too large for your monetary risk budget, the opposing zone is extremely close, or the signal candle remains unfinished under a close-based model. Also reassess pending orders immediately after a major economic surprise; a previously valid Inside Bar may become obsolete. A setup can be visually correct and still unsuitable for a specific account or session.
PIPSEPAISA FREE COURSES
For structured technical analysis education, explore the Free Forex Technical Analysis Course with Sir Sajid Khan Ghori. To understand the economic context behind Forex and Gold, explore the Free Forex Fundamental Analysis Course with Sir Ghulam Abbas. Visit www.pipsepaisa.com and select Courses for enrollment instructions. Courses and trading content cannot guarantee profit.
RISK DISCLAIMER
This is for education only. No indicator, chart pattern or economic release guarantees a trading outcome. Always calculate potential account loss, consider spreads and slippage, and wait for completed confirmation before trading.
Read in Roman Urdu
INTRODUCTION
Inside Bar ke High aur Low, previous Mother Bar ke High/Low ke andar hotay hain (strict wick-based definition). Ye Price Compression hai; next Trend Direction guaranteed nahi.
PRACTICAL EXAMPLE
Gold Bullish H1 Move ke baad Inside Bar banaye to Mother Bar High ke upar Buy Stop Wick se trigger aur fail ho sakti hai. Confirmed Candle Close safer filter ho sakta hai.
LIMITATIONS
Nested Inside Bars dono directions Breakout de sakti hain; News Event conditions badal sakta hai.
INSIDE BAR KYA HOTI HAI?
Inside Bar ek Candlestick Pattern hai jisme newer Candle ka High aur Low previous Mother Bar ke High/Low ke andar rehta hai. Strict Definition mein New High Mother High se neeche aur New Low Mother Low se upar hota hai. Kuch Traders Equal High/Low allow karte hain. Ye Previous Range ke comparison mein Compression dikhata hai, guaranteed directional breakout nahi. Price Upper Side, Lower Side ya further Inside Consolidation mein move kar sakti hai.
MOTHER BAR KA PURPOSE
Mother Bar previous larger Candle hai jo Outside High/Low Boundaries define karti hai. Kuch Breakout Strategies Mother Bar High ke upar Buy Stop ya Low ke neeche Sell Stop plan karti hain. Lekin CPI/NFP jaise Event par Mother Candle bohat large ho sakti hai. Iska Stop opposite extreme ke beyond rakhna small account ke liye expensive ho sakta hai. Mother Bar Range entire H1 Demand/Supply cover kare to blindly order set karna sensible nahi. Candle ki actual Price Distance calculate karein.
STRICT VS FLEXIBLE DEFINITION
Strict Inside Bar mein second Candle High previous High se lower aur Low previous Low se higher. Kuch Models equal boundaries bhi count karti hain. Is se Signals ka number change ho sakta hai, especially tick-size rounded instruments. Backtest se pehle Condition fix karein. Similar Shape wala Winner include aur Loser exclude karne ke liye Definition change na karein. Har historical and live chart par same Rule professional approach hai.
MULTIPLE INSIDE BARS
Kabhi Mother Bar ke andar third/fourth Candle bhi compress hoti hain. Isay Nested Inside Bars kaha ja sakta hai. Lekin multiple bars hone se guaranteed powerful breakout nahi. Kuch Strategies original Mother Bar High/Low rakhte hain, kuch newest smaller Range use karte hain. Dono Models ke Trigger Prices aur Stop Loss distance different hote hain. Entry Expiry aur maximum Bars Count pehle define karein. Pattern form hone ke baad arbitrary Boundaries mat change karein.
EUR/USD BULLISH INSIDE BAR
EUR/USD H4 confirmed Bullish hai. H1 price previously marked Demand Zone par pullback karti hai. H1 bullish rejection Mother Bar aur uske andar smaller Inside Bar banati hai. M15/M5 completed Candle Mother Bar High ke upar close kare, phir Retest/Higher Low hold ho to possible continuation Buy evaluate. Stop Loss meaningful rejection Low ke beyond aur Target H1 Supply. Sirf small Inside Candle banne par market Buy nahi.
GBP/USD BEARISH INSIDE BAR
GBP/USD H4 Lower High/Lower Low Downtrend mein hai. H1 Rally purane Support-Turned-Resistance tak aati hai. Bearish Mother Bar aur Inside Bar form hoti hai. Mother Low ke neeche completed Breakout aur M5 Lower High/Bearish Engulfing Close de to possible Sell Continuation. Lekin BoE unexpected Policy News Price Mother High ke upar push kar sakti hai. Technical Pattern Future UK Economic Surprise predict nahi karta.
GOLD NUMERICAL EXAMPLE
Gold H1 Mother Bar High $2520 aur Low $2500 hai. Next Candle High $2515 aur Low $2507 bana kar completely Mother Range mein rehti hai. Ye Inside Bar hai. Mother High $2520 ke upar Buy Stop short Wick se trigger ho sakti hai, chahe Price final Candle neeche close kare. Agar Entry above $2520 aur SL below $2500 ho to over $20 Gold Price Distance hai. Actual Monetary Risk Broker Contract Size ke mutabiq calculate karna zaroori hai.
BUY STOP VS CANDLE CONFIRMATION
Mother High ke upar Buy Stop price touch hone par activate ho sakti hai, completed M5 close wait nahi karti. Conservative Strategy Full Candle Close aur Retest demand karti ho to Pending Order First Touch par fill hona original Rules violate kar sakta hai. Direct Breakout Model fast move capture kar sakta hai magar False Wick risk bhi. Dono Methods ka Win Rate, Net R, Slippage aur Spread separately compare karein. Same data par honest test important hai.
INSIDE BAR FAKEY PATTERN
Price Mother Bar Upper High cross kare, Orders trigger hon aur Price wapas Range mein close ho. Baad mein Lower Boundary break ho to Failed Breakout/Fakey Model discuss ho sakta hai. Lekin Chart se kisi specific Bank ke intentional Stop Hunt ka proof nahi. Actual observable conditions Wick, Completed Reclaim, CHoCH aur Retest hain. Failed Break Strategy original continuation Model se alag hai. Stop/TP aur RR pehle decide karein.
M1 VS H4 INSIDE BAR
M1 ki Inside Bar tiny Noise ho sakti hai jabke H4 Inside Bar multi-hour behavior summarize karti hai. Intraday Framework H4 Bias, H1 Demand/Supply aur M5 Entry Trigger use kar sakta hai. Har M1 Inside Bar trade karna Overtrading generate kar sakta hai. Pattern Timeframe aur Confirmation Timeframe fix karein. Trend opposite ho to setup countertrend classify karein, normal H4 continuation nahi.
SUPPORT RESISTANCE CONTEXT
Inside Bar H1 Range Middle mein ho to limited directional context. Agar same Pattern H4 Demand par banay to bullish observation location clearer ho sakti hai. Lekin H4 Supply ke bilkul neeche extended Rally ke baad Mother Bar/Inside Bar ho to upside target poor. Location, Opposing Zone Distance aur H1 Market Structure ko priority dein. Pattern itself guaranteed institutional order cluster nahi.
STOP LOSS LOT SIZE
Mother Bar huge ho to opposite Extreme ke beyond SL wide ho sakti hai. M5 Swing Stop smaller ho sakta hai, lekin woh different invalidation Model hai. Sirf Big Lot fit karne ke liye SL normal candle Noise ke andar na rakhein. Account Equity Risk Budget aur Price Distance ke mutabiq Volume select karein. Gold aur EUR/USD Pip/Contract Values different hain. Broker Minimum Lot risk exceed karti ho to No Trade.
NFP CPI AUR INSIDE BARS
Major Economic Release se pehle market compress kar sakti hai aur Inside Bars ban sakti hain. News par Price both boundaries sharply cross kar sakti hai aur Stop Slippage risk large ho sakta hai. Agar Strategy News Avoid karti hai to Pattern ke naam par exception na banayein. Release ke baad Headline/Core/Revisions market interpretation change kar sakti hain. New H1/M5 Structure establish hone ka wait karein. First News Wick reliable breakout guarantee nahi.
BACKTEST CHECKLIST
Inside Bar Equality Rule, Mother Size, Timeframe, Nested Bars, H4 Direction, H1 Level, Wick vs Close Trigger, Retest, SL, TP, News Exclusion aur Trade Expiry likhein. Jo Pattern Breakout nahi deti usay bhi record karein. Failed Breakouts, Costs aur sample size analyze karein. Historical Charts par Rules opportunistically change mat karein. Net Expectancy aur Maximum Drawdown meaningful performance metrics hain.
FAQ
Har Inside Bar strong break? Nahi. Bullish setup mein Child Green mandatory? Definition par depend. Nested Bars possible? Haan. Buy Stop Completed Candle ka wait karti? Nahi. Fake Break dono directions? Possible. H1 Location important? Haan. Risk Management compulsory? Haan.
FINAL PRACTICAL PROCESS
H4 Context → H1 Demand/Supply → Mother High/Low → Completed Breakout/Retest → M5 Confirmation → Structural SL → Correct Lot. Agar Confirmation missing hai, No Trade. Chhoti Candle compression ek Observation hai, Guaranteed Win nahi.
RETEST WAIT KARNE KA COST
Inside Bar Breakout Candle bohat large close ho aur Stop Mother Bar Opposite Extreme ke beyond required ho to SL Wide ho sakti hai. Retest Trader Entry improve kar sakta hai, magar Breakout return na kare to opportunity miss ho jati hai. Dono situations normal Trading Strategy Tradeoffs hain. Historical Data mein Retest Model ka Missed Trade Rate, False Break Entries, Average Net R aur Trading Costs compare karein. Agar Retest Window complete ho aur entry nahi mili to No Trade; Price chase karna different strategy hai.
INSIDE BAR ENTRY NO-TRADE CONDITIONS
H4 Trend strongly opposite? Mother Bar huge aur Stop Budget se bahar? Nearest H1 Supply/Demand too close? M5 Confirmation incomplete? CPI/NFP just about to release? Agar aapke Written Rules in situations ko prohibit karte hain to Trade Skip karein. Normal Market mein valid Pattern bhi Small Account ke liye unsuitable ho sakta hai. Minimum Lot allowed risk exceed kare to Lot round up karne ke bajaye no entry sensible hai.
INSIDE BAR AND EQUITY RISK
Suppose EUR/USD Mother Bar High 1.1050 aur Low 1.1000, total Range 50 Pips. Buy Breakout par SL 1.1000 ke neeche ho to Price Risk over 50 Pips. Agar Equity $1,000 aur max illustrative Risk 0.5% hai to Dollar Budget $5. Required Pip Value $5/50 = $0.10, typical EUR/USD USD Account par around 0.01 Lot. Broker Spread/Slippage ke saath actual loss more ho sakta hai. Pattern Width ko Money Risk mein translate karna seekhein.
NESTED INSIDE BARS PRACTICE
H1 Chart par last 20 Inside Bar Formations note karein. Mother Bar High/Low, number of nested Bars, H4 Bias, H1 Zone, M5 Candle Close, Breakout Direction, Fakeout, Stop Distance aur Target record karein. First-Touch Pending Orders aur Complete-Close Entries ke results separately compare karein. Jo Price multiple days Mother Range mein raha aur Trigger nahi mila, usay report se delete na karein. Accurate sample se Strategy ki real frequency samajh aayegi.
PIPSEPAISA FREE COURSES
Sir Sajid Khan Ghori ke Free Forex Technical Analysis Course mein Price Action, Market Structure aur Confirmation seekhein. Sir Ghulam Abbas ke Free Forex Fundamental Analysis Course mein Gold aur Forex ke Economic Data ka concept samjhein. www.pipsepaisa.com par Courses Tab se Enrollment Instructions check karein. Course Profit ki guarantee nahi.
DISCLAIMER
Ye sirf educational content hai. Koi Indicator, Pattern ya News guaranteed signal nahi. Structural Stop Loss, Account Risk, Spread aur Completed M5 Confirmation ka wait karein. No Confirmation = No Trade.
Educational content only. Trading involves risk. Always use independent analysis and appropriate risk management.