
Bullish and Bearish Engulfing Candle Strategy: Market Structure and M5 Close
PipSePaisa • Forex Education & Research
INTRODUCTION
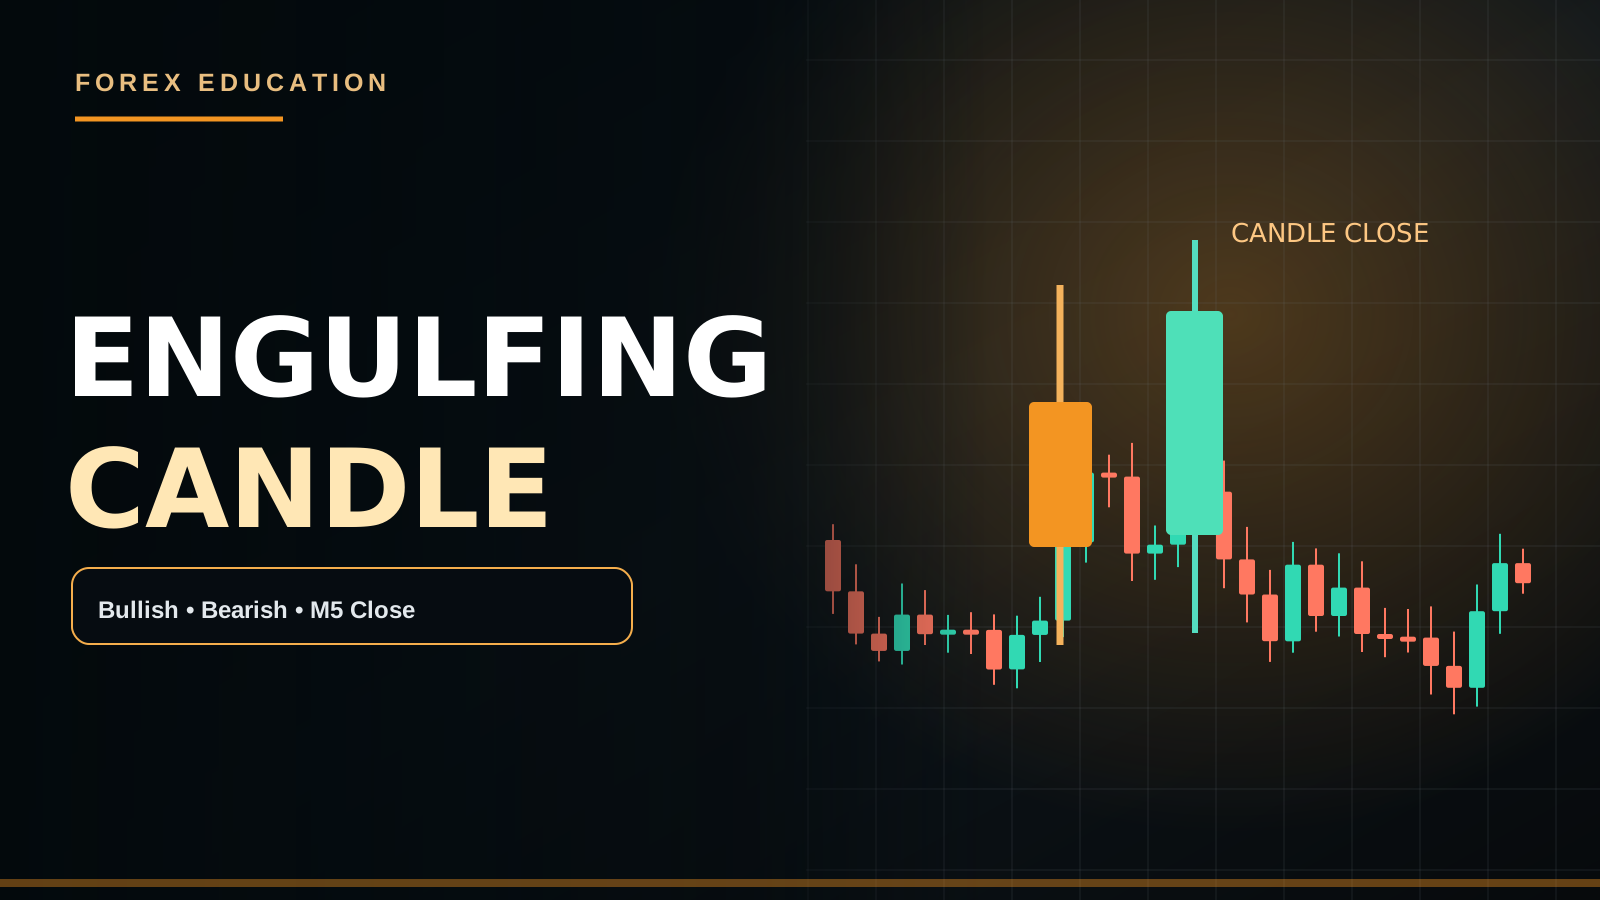
An Engulfing pattern occurs when the current real body overtakes the previous candle's body under a chosen definition. Some traders require close beyond the prior wick or swing, which is a stricter rule than body engulfing alone.
PRACTICAL MARKET EXAMPLE
A bullish M5 engulfing inside Gold H1 Demand after a sell-side sweep can be a conditional trigger. The same pattern directly beneath H4 supply may have poor target space.
IMPORTANT LIMITATIONS
An open M5 candle can appear to engulf then fail to do so at its close.
WHAT AN ENGULFING PATTERN IS
A conventional candlestick Engulfing setup has a second candle whose real body covers the first candle's real body. In bullish versions, the second real body is bullish and overtakes a smaller preceding bearish body. A bearish engulfing reverses the relationship. Traders sometimes require the candle to close beyond the previous high or low, or even beyond a meaningful swing. Those are stricter versions and should not be described as identical to ordinary body engulfing. No candle shape guarantees future market direction.
REAL BODY VERSUS WICK
A candle's real body runs from opening price to closing price, while its wicks record the broader high-low excursion. Body engulfing does not require the second wick to contain the previous wick under the common definition. If a trading mentor requires full-range engulfing, write that explicitly. A candle with a large upper wick but a tiny bearish body might show rejection, yet it may not meet a strict bearish body-engulfing rule. Formula details affect actual setup frequency.
BULLISH ENGULFING AT H1 DEMAND
A bullish engulfing formed after price visits H1 Demand can be a clue that the most recent candle showed stronger upward progress than the prior candle body. But if H4 remains strongly bearish, that signal may be a temporary pullback. Some traders require a previous swing low sweep followed by a completed bullish close above local resistance. This provides a more specific reversal hypothesis than body geometry alone. If the zone fails, the Buy idea must be reconsidered.
BEARISH ENGULFING AT H1 SUPPLY
A bearish Engulfing near historical H1/H4 Supply may provide a short-term warning after a rally. Yet if price is above a well-established H4 bullish structure and there is considerable support immediately below, a Sell may face limited reward. A trader can require M5 Lower High, CHoCH or Breakout-Retest confirmation depending on the model. The completed candle shows a recent shift, but it does not guarantee the next H1 bar will continue falling.
M5 FULL CANDLE CLOSE IS CRITICAL
A developing M5 candle may look like an impressive bullish engulfing at minute three but finish as a small indecision candle by minute five. Entering on the unfinished body means the final pattern condition was not actually met. TradingView and MT5 historical bars usually show completed candles, so comparing early live entries with historical closed-bar signals can distort results. If the system requires a full M5 close, do not trade while that candle is still forming.
BULLISH EUR/USD CASE STUDY
EUR/USD H4 has higher highs and higher lows, while H1 pulls back toward Demand near 1.1020. M5 prints a small red candle and then a bullish candle whose body overtakes it, closing above a local lower high. The trader may consider a Buy with Stop Loss beneath meaningful rejection low and Take Profit near the previous H1 swing high. If the completed candle closes far above the zone, the entry may be extended. Recalculate the real price stop distance and R:R rather than chasing.
BEARISH GBP/USD CASE STUDY
GBP/USD H4 is bearish and H1 rallies into old Support that may now act as Resistance. M5 forms a small bullish candle, followed by a bearish body that engulfs it and closes beneath a local swing low. This may support a short continuation setup with a stop above relevant rejection high. But an unexpected BoE policy statement could drive price higher through Supply. The Engulfing pattern is conditional information, not protection from fundamental repricing.
GOLD LIQUIDITY-SWEEP EXAMPLE
Gold may trade above an H1 Previous High or Equal Highs, then close back beneath that area. If a bearish M5 Engulfing subsequently closes below a local Higher Low, a trader might evaluate a failed-breakout Sell model. But the Wick Sweep does not prove a specific institution intentionally hunted stops. A second attempt at the highs could succeed, and the bearish setup could lose. Stop placement should correspond to structural invalidation and the nearest H1 Demand should shape the target.
BODY SIZE AND VOLATILITY
A large engulfing candle may look powerful but require a wide Stop Loss if the entry occurs near its close. A smaller candle at a meaningful Support Zone can sometimes have a better reward-to-risk geometry. ATR may help compare candle range with typical volatility, but ATR does not supply direction. Avoid assuming the biggest engulfing always delivers the greatest profit. Calculate how much price has already moved, not only whether the pattern's shape is correct.
ENGULFING VERSUS PIERCING PATTERN
A bullish Piercing pattern generally involves a second bullish candle recovering into the prior bearish body but not necessarily engulfing the entire body. The conditions can differ based on candle gap conventions, which behave differently in continuously quoted Forex markets. A Bullish Kicker is another distinct multi-candle concept. A trader should not label every green candle after a red candle as a full Engulfing. Precise definitions help avoid inflated historical signal counts.
ENGULFING WITH MARKET STRUCTURE
A bullish engulfing after an H1 bearish CHoCH or at a valid Demand Zone has different context from the same candle in the middle of sideways movement. An M5 Buy trigger can appear even when H1 has not broken a meaningful lower high, so distinguish internal and external structure. A more conservative model may require both a specific close beyond a local swing and alignment with H4 direction. Each added rule affects frequency and the quality of resulting entries.
ENGULFING WITH ORDER BLOCKS AND FVG
SMC traders may identify an Order Block or Fair Value Gap near where an Engulfing appears. Those additional drawings can focus attention on potential reaction areas but do not guarantee hidden institutional orders. An Order Block concerns a chosen origin candle/base, an FVG a selected three-candle range gap and Engulfing the relative bodies of adjacent candles. They are different chart features. Evaluate their incremental usefulness instead of treating three labels as proof that the next candle must win.
CONTRARIAN ENGULFING IN A TREND
A bearish engulfing can form during an H4 uptrend as part of a routine pullback, and a bullish engulfing can occur during an H4 downtrend as a corrective rally. Trading against the larger direction requires different entry, target and invalidation rules than trend continuation. A system that ordinarily follows H4 should not convert a countertrend M5 engulfing into a major new market bias without structural evidence. Staying flat is appropriate when the necessary context is absent.
NEWS AND SPREAD CONDITIONS
NFP, CPI or FOMC can produce huge Engulfing candles, sometimes in both directions within minutes as market participants reinterpret details. Bid/Ask spreads can widen and broker stop orders can slip. A large M5 close might be visually confirmed yet financially unsuitable due to the distance to a sensible Stop Loss. If the strategy excludes news trades, do not abandon that filter for a dramatic candle. Price-action confirmation must be accompanied by execution discipline.
ENTRY, STOP LOSS AND TARGET
Before Buy or Sell, define the exact timeframe, H4 bias, H1 location and completion of the Engulfing body. Identify the real Swing Low or High where the idea fails. Calculate monetary loss using lot size and contract specifications. Decide target using nearby Support/Demand/Supply rather than a fixed unrealistic move. If the target is closer than the stop for a strategy requiring higher reward, reject the entry. A candle pattern does not override risk.
ENGULFING BACKTEST CHECKLIST
Choose whether bodies, full wicks or swing closes must engulf; fix timeframe and trend filter; define minimum body size and whether doji candles count. Log all matching setups, including those that reverse immediately. Compare First-Touch, Closed-Candle and Breakout-Retest methods independently. Include broker spread, commission and slippage, and measure net R with a meaningful sample. Best-looking historical candles are not enough to establish an edge.
FAQ AND KEY RULE
Does a Bullish Engulfing mean guaranteed Buy? No. Can a forming candle lose its engulfing shape? Yes. Is a full wick engulf compulsory? Only if the chosen definition requires it. Can engulfing occur against H4 trend? Yes. Does a liquidity sweep guarantee its success? No. Can a confirmed trade still hit SL? Yes. H4 Context → H1 Zone → Completed M5 Engulfing → Risk Calculation → Possible Entry. No Confirmation = No Trade.
AN ENTRY RULE THAT CAN BE AUDITED
A strong educational trading model specifies not just the words 'Engulfing confirmed' but the exact reference bars and levels. For instance, decide whether the second M5 body must cover the first open-close interval and whether its close must also break an M5 swing high. Save the data available when the signal finished. A trader who switches between body engulfing and wick engulfing depending on which past trades won has not tested one repeatable system. Rule consistency is as important as learning the candle shape.
A STOP-PLACEMENT EXERCISE
Take a hypothetical EUR/USD long at 1.1050 after a bullish engulfing and a significant rejection low at 1.1020. The structural distance is thirty pips before buffers. If the maximum planned monetary loss is $6, a suitable pip value is about $0.20 before commission, on a typical USD account corresponding to roughly 0.02 lot EUR/USD. This calculation is an illustration, not an individualized lot recommendation; brokers and symbols differ. Position sizing, not candle confidence, limits exposure.
PIPSEPAISA FREE COURSES
For structured technical analysis education, explore the Free Forex Technical Analysis Course with Sir Sajid Khan Ghori. To understand the economic context behind Forex and Gold, explore the Free Forex Fundamental Analysis Course with Sir Ghulam Abbas. Visit www.pipsepaisa.com and select Courses for enrollment instructions. Courses and trading content cannot guarantee profit.
RISK DISCLAIMER
This is for education only. No indicator, chart pattern or economic release guarantees a trading outcome. Always calculate potential account loss, consider spreads and slippage, and wait for completed confirmation before trading.
Read in Roman Urdu
INTRODUCTION
Engulfing mein current Candle Body previous Candle Body ko cover karti hai (chosen definition). Kuch traders previous Wick ya Structure ke beyond Close require karte hain; ye stricter rule hai.
PRACTICAL EXAMPLE
Gold H1 Demand aur Sell-Side Sweep ke baad Bullish M5 Engulfing possible trigger ho sakti hai. H4 Supply ke neeche same candle poor RR de sakti hai.
LIMITATIONS
Open M5 Candle initially Engulfing dikh kar final Close par fail ho sakti hai.
ENGULFING PATTERN KYA HAI?
Common Engulfing Pattern mein second Candle ki Real Body previous Candle ki Real Body ko cover karti hai. Bullish version mein second Bullish Body previous Bearish Body ko overtake kare. Bearish version mein opposite. Kuch mentors previous Wick ya meaningful Swing ke beyond Close bhi require karte hain, jo Strict Method hai. Har Green Candle after Red ya Red after Green necessarily Engulfing nahi. Pattern shape future winning trade guarantee nahi.
CANDLE BODY VS WICK
Real Body Open aur Close ke darmiyan hoti hai, Wicks Full High-Low Price Movement dikhati hain. Common Body Engulfing mein second candle ka entire Wick previous Wick ko cover karna compulsory nahi. Agar Strategy Full-Range Engulfing demand karti hai to usay clearly define karein. Chhoti Bearish Body aur Huge Upper Wick Rejection show kar sakti hai, lekin Strict Bearish Body Engulfing Rule meet na bhi kare. Definitions signal frequency change karti hain.
H1 DEMAND PAR BULLISH ENGULFING
H1 Demand Zone par Bullish Engulfing aaye to latest short-term Price Reaction bullish ho sakti hai. Lekin H4 Strong Downtrend intact ho to ye temporary Pullback bhi. Kuch Conservative Strategies Previous Swing Low Sweep, Price Reclaim aur M5 Bullish Close above Local Lower High require karti hain. Ye mere Green Body dekhne se zyada specific setup hai. Zone fail ho to Buy Thesis invalid ho sakti hai. Candlestick Context ke baghair trade na karein.
H1 SUPPLY PAR BEARISH ENGULFING
H1/H4 Supply par Bearish Engulfing recent Rally ke baad Selling Reaction clue ho sakti hai. Lekin H4 Bullish Trend bohat strong ho aur Support neeche close ho to Countertrend Sell ka RR poor ho sakta hai. M5 Lower High, CHoCH ya Breakout-Retest confirm karein depending written strategy. Completed Bearish Candle next H1 Candles guaranteed Red nahi banati. Strong Economic Data Supply Level ke through Price push kar sakta hai.
M5 COMPLETE CANDLE CLOSE
M5 Candle minute three mein Bullish Engulfing dikh sakti hai magar final two minutes mein reverse ho kar Doji ya Bearish Close de sakti hai. Agar Setup Full Candle Close demand karti hai to Open Candle par Entry rule violation hai. Historical TradingView/MT5 candles final values show karti hain, isliye early live signals aur historical screenshot directly equal nahi. No Confirmation = No Trade ka principle consistent follow karein.
EUR/USD BUY EXAMPLE
EUR/USD H4 HH/HL Bullish hai aur H1 1.1020 Demand par Pullback karti hai. M5 chhoti Red Candle ke baad Bullish Body previous Body ko cover karti hai aur local Lower High ke upar Close deti hai. Possible Buy Continuation consider karein. SL actual rejection Swing Low ke beyond, TP previous H1 High/nearest Supply. Agar large Candle ke baad Entry extended ho gayi to SL distance aur RR dobara calculate karein.
GBP/USD SELL EXAMPLE
GBP/USD H4 Downtrend hai aur H1 Broken Support ko Resistance ke taur par retest karti hai. M5 chhoti Green Candle ke baad Bearish Engulfing Body previous Body cover karti hai aur Local Low ke neeche close hoti hai. Possible Sell Continuation Setup. Stop Loss relevant Swing High ke beyond. Lekin Unexpected BoE Policy Guidance Price H1 Supply ke upar push kar sakti hai. Candle Macro Surprise ke against insurance nahi.
GOLD SWEEP + ENGULFING
Gold H1 Previous High ya Equal Highs ke upar Price Move kar ke Range mein Return kare. Phir M5 Bearish Engulfing local Higher Low ke neeche complete close kare to possible Failed Break Sell Strategy. Lekin Wick Sweep prove nahi karti ke particular bank ne intentionally Retail Stops hunt kiye. Market Highs dobara test kar ke Breakout continue bhi kar sakti hai. Stop Loss logical Sweep High aur TP Nearest H1 Demand ke mutabiq evaluate karein.
LARGE ENGULFING CANDLE
Bohat Large Engulfing visually strong lagti hai lekin Candle Close par Entry lene se SL wide ho sakti hai. Chhoti Candle H1 Demand par better RR de sakti hai depending setup. ATR average Candle Volatility ka context provide kar sakta hai, Direction nahi. Biggest Green Candle guaranteed biggest reward nahi. Jo movement already ho chuki, usay Future Available Profit na samjhein. Target Room aur Actual Stop Distance calculate karein.
ENGULFING VS PIERCING
Bullish Piercing Pattern mein second Bullish Candle previous Bearish Body ke andar meaningfully recover karti hai magar full body engulf necessary nahi. Forex Continuous Trading mein Gap Requirements Stock Chart se different practically appear kar sakti hain. Bullish Kicker bhi separate Candlestick Pattern hai. Every Reversal Candle ko Engulfing label karna accurate nahi. Exact Body/Wick Criteria, Timeframe aur Previous Candle Structure define karein.
MARKET STRUCTURE KE SAATH
M5 Bullish Engulfing H1 Demand aur relevant Bullish CHoCH ke baad bane to context stronger ho sakta hai. Same Green Candle H1 Range Middle mein weak signal bhi. M5 Internal High Break aur H1 External Structure Break separate importance rakhte hain. H4 Trend Filter aur Nearest Supply ko ignore na karein. Additional Confirmation frequency reduce aur Entries late kar sakti hai; ye tradeoff Backtest mein measure karein.
ORDER BLOCK AUR FVG
Engulfing Candle OB ya FVG ke qareeb form ho sakti hai. Lekin OB selected Origin Candle/Base, FVG three-candle price imbalance aur Engulfing adjacent Bodies ka relation hai. Teeno alag Technical Features hain. Labels ka overlap hidden institutional order guarantee nahi. Har Concept ka actual Rule fix karein. Agar Extra OB/FVG Indicator Net Win/Loss improve nahi karti to Chart Complexity unnecessarily increase ho sakti hai.
COUNTERTREND ENGULFING
H4 Uptrend mein M5 Bearish Engulfing normal Pullback ho sakti hai. H4 Downtrend mein M5 Bullish Engulfing temporary bounce ho sakti hai. Agar Strategy H4 Trend Follow karti hai to M5 opposite candle par Major Reversal assume na karein. Countertrend Strategy alag Stop, TP, Timeframe aur Higher Quality Confirmation demand karti hai. No Trade appropriate hai jab context incomplete ho.
CPI NFP AUR WIDE SPREAD
CPI/NFP/FOMC par large Engulfing candles aur two-sided volatile Whipsaw possible hain. Bid/Ask Spread Wide aur Stop Slippage risk increase ho sakta hai. Candle fully close hone ke bawajood Stop Distance too wide ho ya price target already near, to Trade financially unsuitable hai. Agar Plan News Avoid karta hai to Giant Candlestick ki wajah se Exception na banayein. Fundamental Interpretation aur Price Reaction dono matter.
SL TP AUR LOT
Entry se pehle H4 Bias, H1 Zone aur M5 Complete Engulfing Confirmation define karein. Price kis Swing par thesis invalidate karti hai? Uske beyond Stop. Equity Risk, Pip Value aur Gold Contract Size ke mutabiq Lot. TP previous H1 Resistance/Demand ya tested RR model. Agar Nearest Target Risk se chhota aur Strategy required payoff higher hai to Skip. Pattern Trading Risk Management replace nahi karti.
BACKTEST CHECKLIST
Body Engulf, Full Wick Engulf ya Swing Close? Minimum Body Size? Timeframe? H4 Direction? H1 Location? M5 Trigger? News? SL/TP? Har historical matching Winner/Loser include karein. First Touch vs Full Candle Close vs Retest Model separately compare karein. Commission/Spread aur Slippage se Net Result nikaalein. Good-looking Historical Candles guaranteed Trading Edge nahi.
FAQ
Bullish Engulf guaranteed Buy? Nahi. Open Candle Shape Change? Haan. Wick Full Engulf compulsory? Rule par. H4 Countertrend Engulf possible? Haan. Sweep Success Guarantee? Nahi. Confirmed SL possible? Haan. Process H4 → H1 → M5 Close → SL/Risk → Entry. No Confirmation = No Trade.
ENGULFING RULE AUDIT
Strategy mein sirf 'Engulfing Confirmed' likhna enough nahi. Define karein second M5 Body previous Open-Close ko cover karegi ya Entire High/Low? Kya second Close Local M5 Swing High ke upar compulsory hai? Kya Candle ka minimum Body Size ya Range Ratio chahiye? Jab Rules clearly documented honge to Historical aur Live trades fairly compare ho sakti hain. Har Winner par Body Rule aur Loser par Wick Rule change karna biased analysis hai. Full Candle Close aur Price Zone actual trading information hain.
NUMERICAL RISK CALCULATION
EUR/USD Bullish Engulfing ke baad Buy Entry 1.1050 aur meaningful rejection SL 1.1020 ho to Risk 30 Pips. Agar illustrative Account Dollar Risk $6 ho to Required Pip Value $6/30 = $0.20. Typical USD EUR/USD Account mein around 0.02 Lot possible, lekin Broker Lot Step, Currency aur Costs verify karein. Sirf Engulfing A++ label se Lot double na karein. Gold mein same Decimal Distance ka Account Risk Contract Size ke mutabiq different hai.
REPEATED SIGNALS DURING RANGE
H1 Sideways Market ke beech M5 multiple Bullish aur Bearish Engulfing bana sakti hai. Agar Trader har Candle opposite Market Order leta jaye to Spread/Commission aur Whipsaw losses barh sakti hain. H4 Trend, H1 Support/Demand, H1 Supply aur Range Boundary identify karein. Middle of Range par No Trade Filter useful ho sakta hai. Indicator ya Candle Pattern har Market Regime mein same performance de, zaroori nahi.
ENGULFING JOURNAL WORKSHEET
M5 Candle Time, Previous Candle Body, Engulfing Body Range, H1 Zone, H4 Bias, CHoCH/BOS, Entry, SL, TP, Spread, Commission aur Net R record karein. Unfinished Candles ko qualified signal ke taur par count na karein. News Sessions aur Quiet Sessions separate analyze karein. First-Touch vs Full Close vs Retest Entry Models ko alag compare karein. Jo setups confirmation absent hone par skip hue unhein bhi record karein. No Confirmation = No Trade.
PIPSEPAISA FREE COURSES
Sir Sajid Khan Ghori ke Free Forex Technical Analysis Course mein Price Action, Market Structure aur Confirmation seekhein. Sir Ghulam Abbas ke Free Forex Fundamental Analysis Course mein Gold aur Forex ke Economic Data ka concept samjhein. www.pipsepaisa.com par Courses Tab se Enrollment Instructions check karein. Course Profit ki guarantee nahi.
DISCLAIMER
Ye sirf educational content hai. Koi Indicator, Pattern ya News guaranteed signal nahi. Structural Stop Loss, Account Risk, Spread aur Completed M5 Confirmation ka wait karein. No Confirmation = No Trade.
Educational content only. Trading involves risk. Always use independent analysis and appropriate risk management.